Tuesday, 7 August 2012

Wedding Series - Smoky Look

In continuation of the wedding makeup request, I am here to today to share makeup number 2 of 3 - Smoky Look! Check out the first look I created for the series here.

Begin with a clean palette and prime your face with a moisturiser or face primer.

Complete Look

BEFORE

Sigma F80; Revlon Photo Ready Foundation in 004 Nude

Similar to my last post, I would like to remind you to avoid using any sun screen or a foundation that contains high sun protection. This is create a white cast on your face during flash photography. This foundation colour is definitely getting slightly too light for me, I'll be switching it up a shade!

Remember to fix your eyebrows too!

Water Strong W Eyebrow; Spoolie


Candy Doll Concealer in colour 1

I like to apply concealer after the foundation. This way I won't need to apply many layers of foundation and cover up the areas that require more coverage with a concealer. You can also blend it the concealer on areas that you wish to highlight.

haha!

Now let's continue on to the eyes..

Where to tight line?

I never skip tight lining my eyes whenever I do a makeup look. It is important for sparse lash girls like me as it will create a fuller looking lash line and also make your eyes appear more awake.

There!!!

I know it looks quite creepy.. At this step you don't have to worry for it to look perfect!

Prime your lids

Use Urban Decay Primer Potion in Sin to prime your lids. This prevents your eyeshadow from creasing and enhances the colours that we will be applying later!

Majorlica Majorca in BE286

Use a shimmery pinky/ coraly  colour and apply it on the inner 1/2 of your eyelids.

Like so..

MAC Eyeshadow in Club

With the same brush, apply colour Club on the outer 1/2 of your lids. Remember to always look straight and check where you want the eyeshadows to end.

I highly recommend this MAC colour! It is a duo chrome brown/green base with coral when blended out. 


Always check where your eyeshadow ends!!

Blend it out so that there won't be a harsh line on your lids. Use a fluffy brush like the one below.

Sigma Blending Brush

Blended

MILANI Liquif'Eye Eyeliner Pencil in Black

With the same eyeliner that we used for tight lining, line your lash line and blend it out with a black shadow using a pencil brush.

Pencil Brush; Matte Black Shadow

Blend out the liner

With the remaining left on the pencil brush, blend it slightly onto the lower lash line. Use the tip of the shadow brush and apply the shimmery colour in the inner corner of the lower lash line.
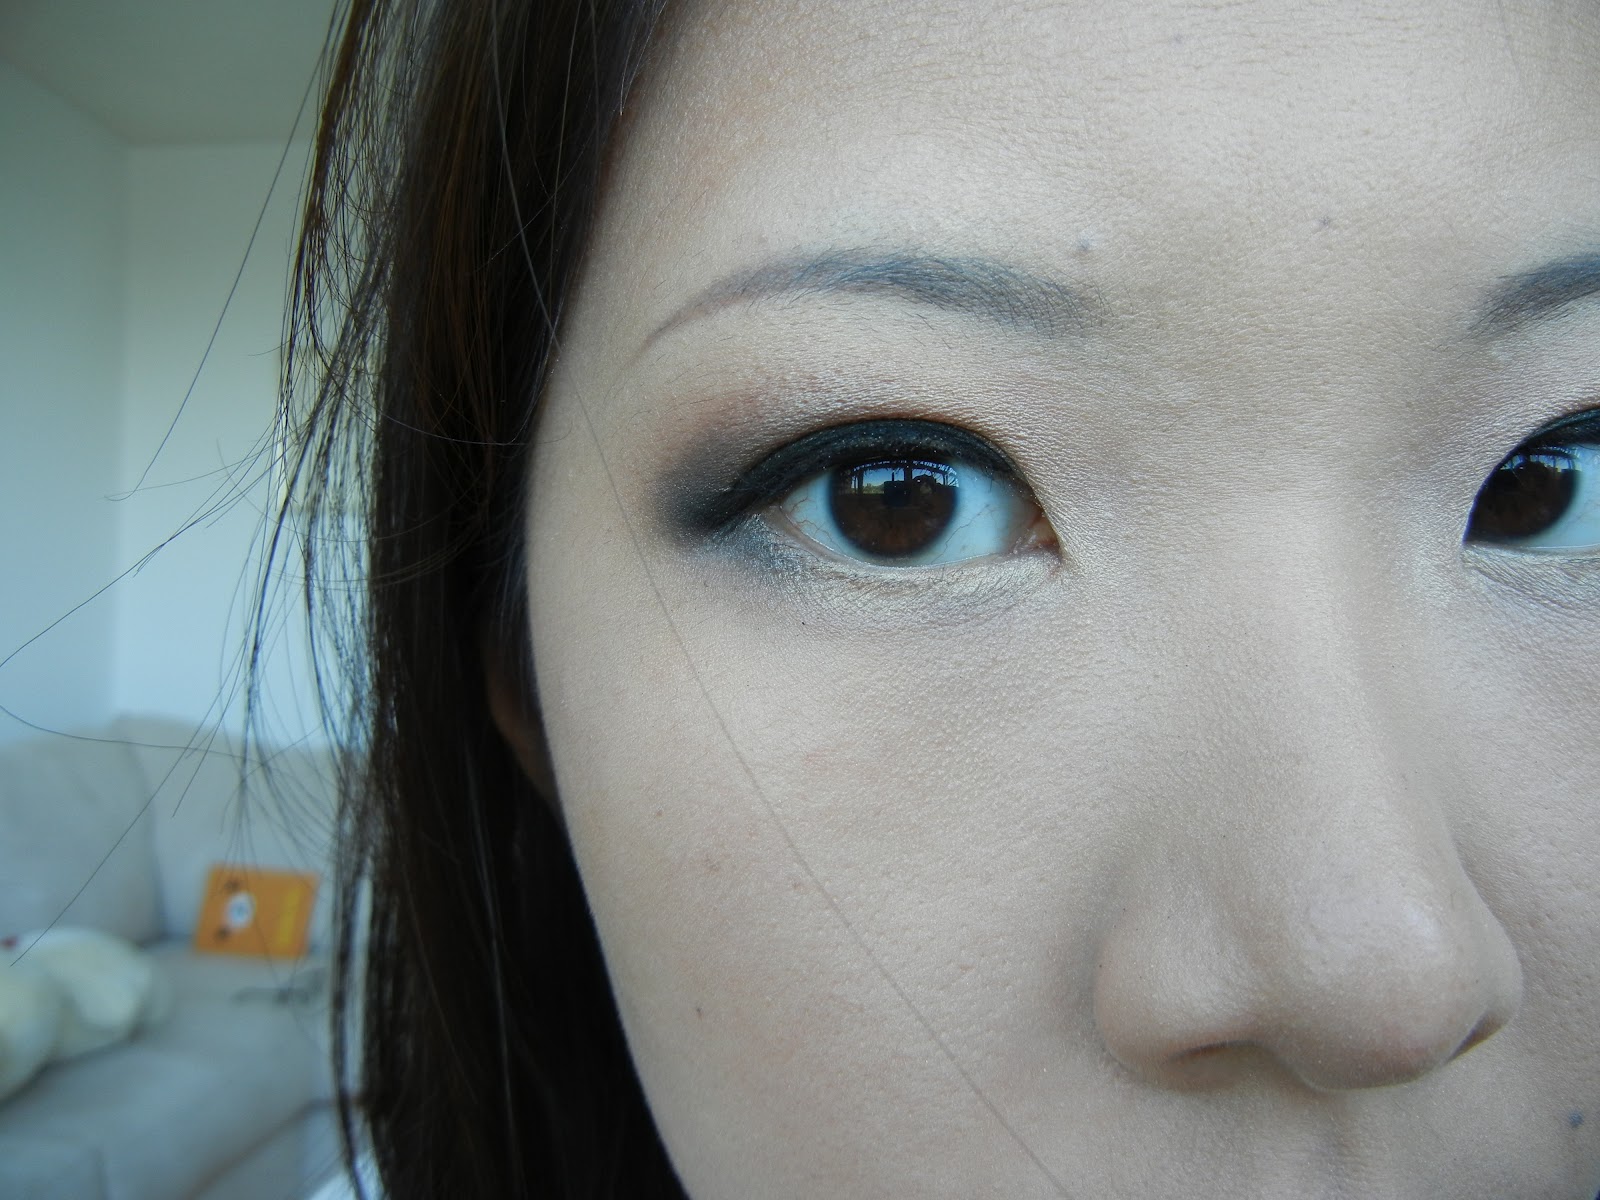
Almost there!

Tapered Brush; NYC Sunny Bronzer

With a matte bronzer or a dark powder, contour the sides of your face and nose.

Lightly contoured

For this look I recommend to use a coral colour blush.

Small Stippling Brush; Pantone + Sephora Blush in Apricot Brandy

I recommend to always use a stippling brush when dealing with blushes or bronzers that are extremely pigmented. 

Yay!!

Now to complete the look..

Tarte LipSurgence in Smitten

This product is absolutely moisturising and long lasting! If you are not intending to reapply very frequently, use this!!! You can purchase this at Sephora! It comes in many colours and I really want to get more of them!!

Close up

Last but not least..

Urban Decay All Nighter Long Lasting Makeup Spray

Make sure you can dance for all night long at your wedding reception!

Complete Look!!!

Thank you for your support and please follow me on Twitter if you wish to chat with me!


Monday, 6 August 2012

BRTC Jasmine Water BB Cream Review

I'm sure everyone is super hyped up about the BB creams in the market. We are flooded everyday with more companies coming out with BB creams, especially from the western companies. Nonetheless, I still like to try out as many as possible and share my favourites with you ladies!!

Today I'll be reviewing the BRTC Jasmine Water BB Cream.

BRTC Jasmine Water BB Cream

I received this product from BRTC along with the Aqua Rush BB Cream. I decided to give this a go since I am able to test the longevity and how the product withstand heat in this hot summer day!

BEFORE

I've actually gotten even more tan from the last time because we went to the beach on Saturday! I applied the product using Sigma F80 Flat Top Brush.

AFTER

The product has a jasmine scent to it but not sickening. It is definitely too light for my skin now, just like the other bb cream. Though I would rather work with a foundation that is lighter than my skin than one that is way too dark.

Close up

This BB cream claims to have 3 main functions other than coverage, which are, skin whitening, wrinkle repair, and  water replenishment for your skin. 

Upon application, I could definitely tell that this product is less nourishing than the Aqua Rush. Which means that this will be more suitable for you girls with combination oily skin!

I went ahead to apply the rest of my makeup. I did not set this BB cream with powder. 

Complete look for the day!

We went out and about, including having a short stroll at Woodbine beach.

After about 5 hours of wear...

Close up after 5 hours

after 5 hours

It wasn't very humid today so I didn't have much problem with sweat or oil on the face. The BB cream has definitely worn off slightly but most of it is still on my skin. Redness is now showing through slightly around the nose.

Pros:
  • Suitable for combination to oily skin
  • Medium coverage
  • Light weight
Cons:
  • Limited colour selection
  • Slightly scented (Personally prefer face product with no scent.)
This is overall a great product and I would recommend it. You can get yours either at BRTC Store or Momomango

If you have any other product recommendations please leave a comment or tweet me at:

See you tomorrow!

P/s: I've recently been to an interview with Koo Creative and really looking forward to have a chance to work with them. Wish me luckkkkkkkkk!!!

Friday, 3 August 2012

Wedding Makeup Series - Purple Haze

Hi beauties! I'll be doing a wedding makeup series consisting 3 different looks starting today. This is a special request from my friend Christyn, for her friend, who will be getting marry at the end of this year. Congratulations!! 

I'll be sharing some of my tips and tricks to make your makeup last for the entire day in 99% humidity. This was personally trial and tested in Malaysia.


My look today is roughly based on my own wedding celebration back in Malaysia. 


 A bride still has to eat right?? 

Let's begin!


BEFORE

Because a bride will be taking a lot of pictures, and chances of camera flashing your face it high, I recommend to not use a sun screen or choose a foundation with low sun protection. This will prevent your face from looking much whiter than the rest of your skin.


MAC Prep + Prime

There are many face primers in the market, I am not recommending this in particular. You can use whatever product that you have.


Sigma F80; Revlon Photo Ready Foundation in 004 Nude

I like this foundation and think that it looks great in pictures. It has a low SPF 20 so it will not reflect like as much. REMEMBER, pick a colour that matches your neck. DO NOT try to look fair by picking one that is way too light for you!! You want to look natural and beautiful on your big day!


Doll Face Concealer in 01 (available in SASA)

After foundation application, apply your concealer to spots that needs more coverage. If you like, you can apply it to areas that you wish to highlight.


Concealer application

Blend it out with the same flat top brush. You will see a drastic difference. Try not to put on too much foundation in the initial step, your concealer should to the job for you.


After blending out the concealer..

Here comes the brows. If you don't know how to do it properly, practise! Otherwise use a pencil or eyeshadow that is a shade lighter than your eyebrows. Try to make it as natural as possible, it's not a time to go adventurous with them as you will keep these pictures forever...


Spoolie; Water Strong W Eyebrow Pencil

I highly recommend this eyebrow pencil if you are able to purchase it. Blend out the pencil with spoolie.


Too Faced Shadow Insurance

Prior to any eye makeup, apply a VERY SMALL amount of this onto your lids and some on your lower lash line. This is a must if you do not want your makeup to crease. Urban Decay Primer Potion is another good substitute. (Sephora)


MAC Blacktrack Fluidline; Angled eyeliner brush

Tight line your eyes to make your lashes look fuller. Unless you are already gifted with beautiful lashes you can skip this step. If you are uncomfortable with using a gel liner, use a VERY water resistant pencil liner.


Tight lined

Now to the eyeshadows!


Fizz (Smashbox Photo Op Palette)

Use a flat shader brush with a light beige colour with a sheen and apply if on to the 1/2 of your upper lid and 1/2 of your lower lash line.


As such..


Amethyst 

Flip the brush and apply colour Amethyst. This is an eyeshadow that has a purple base, but as you blend out, it creates a slight brown tone.


With Amethyst

Remember to always open your eyes and look straight to check where the eyeshadow ends. For special occasions, I like to bring it up slightly higher than usual to create an illusion of bigger eyes.


Check where your eyeshadow ends!


Rose; Tapered Blending Brush

With a lighter purple colour, place it on the middle of the eye lid and slightly blend it across the top (where the eyeshadow ends).


Doe

Flip the brush to another side, use a brown that is 2 shades lighter than you, blend it at the top outer corner to give the look some warmth.


Blended


Vanilla; Blending Brush

Use a matte highlight colour and clean the area underneath the eyebrows for a polished look.


Line your eyes with the same gel liner and angled eyeliner brush. Remember to keep as close to your lash line as possible.


Use the tip of the flat shader brush, take a brown shade and shade the outer corner of the lower lash line.


Progress so far...

You can choose to use false lashes, but since I'm not actually going anywhere fancy, I applied mascara only.


ELF Blush in Passion Pink

Apply a blush that has a slight sheen, this will act as a cheek highlight as well as blusher. I do not recommend to highlight your face because it will already be shiny easily with the humidity.


NYC Sunny Bronzer, ELF Complexion Brush; Sigma F35

Remember to contour LIGHTLY!!! I use the complexion brush for the sides of my face and the tapered brush for the sides of my nose.


Right side contoured; Left only blush

You want to look slimmer in your pictures I suppose? I want to anyways! =P


Almost there..

Use your favourite nude lipstick, preferably one that does not make you look too pale.


Complete look!!!!

Here comes my secret...


Urban Decay All Nighter Long Lasting Makeup Spray

Get this at Sephora! I only have the trial size but this is all I need. I don't really go to events that last for an entire day so I use this on special occasions! THIS IS AMAZINGGGGG!! 

Spray it generously (without making your face wet) across your face. Make sure only to gently dap your face with tissue paper with you are getting rid of the sweat. Try not to wipe. 

If you wish you can bring a powder and brush to touch up your face during the day. Beware, it can look cakey after too many layers.

To end this post, a photo of my husband and I in the bridal car!


Have a great weekend everyone!!!!!

Wednesday, 1 August 2012

July Favourites

Happy August! We are officially half way through summer! Coming from a background that only has summer all year round, I hate to see the warm weather go. Nonetheless, nothing I can do to change that, so I've gotta embrace whatever that I have now!

I am planning a series of celebrity inspired makeup tutorial for this month. If you have any request or suggestions, please let me know down in the comments or Tweet me! I'm always there and always responsive :)

Today I'm here to share the products I have been loving for the month of July!

1. Maybelline The Falsies Volumn Express Black Drama Mascara

Love this mascara! It gives both volume and length to my lashes!! I have not tried Maybelline for a long time and I am so glad that I decided to give this a try. Definitely the best drug store mascara I have so far.

2. Tarte LipSurgence Lip Shine in Smitten

If it wasn't for the price that they are selling in Sephora, I would pick up ALLLLLLL of them! This stuff is super moisturising and long lasting. I had it on for 4 hours, talking, eating, and drinking, I can't believe that when I looked into the mirror I could still see the remnants of the lipstick!!!!!!!!!!!!!!!!!

If you are able to purchase it from QVC, it is way cheaper!

3. Etude House I Love Paris series Lipstick in No.3

If you are lucky enough to have access to Etude House product, this liptick is the perfect nude colour. 

4. ELF Studio Baked Blush in Passion Pink


This blush provides the right amount of sheen and colour on your cheeks for those days when you want to look natural. Surprisingly this colour is not out of stock on ELF's website. I'm definitely going to try out others when I have a chance!

5. Physicians Formula Shimmer Strips Eye Brightening Eyeliner in Black


I cannot say enough good things about this eyeliner. Although the other colours are great too, I am particularly in love with the black one. I have replaced this with the MAC's blacktrack fluidline for tight lining my eyes. It is also retractable so it makes it convenient to apply without having to sharpen it once it goes dull.


6. Revlon Photo Ready Foundation in 004 Nude


I have many foundations and this is the one that I often go back to when in doubt. It gives medium coverage after first application and looks great in photos. Long lasting coverage!

7. Urban Decay by Skindinavia All Nighter Long Lasting Makeup Setting Spray


This is the saviour for humid summer weather. Try it for yourself if you don't believe it. 


I got this premium size sample from the Tarte makeup set that I purchased from QVC recently. I am so glad that I tried this product! It's so moisturising!

My story behind all eye creams are the irritate my eyes so bad. My eyes will produce excessive amount of gunk build up and in the morning, I cannot open my eyes because the gunk are stuck on my lashes. I know it sounds absolutely disgusting, but that's the truth.

This product is apparently not out in the market yet. I am DEFINITELY going to make a purchase when it is.

9. Forever 21 Bejewelled Hair Pin


Non beauty fav for the month! I picked this up from F21 this afternoon. I love hair pins because my fringe is not long enough to be tucked to the back of my ears. Chic hair pins are must have for me!

Thank you for all the support and please come back for more hauls and tutorial updates!

Follow me on Twitter!