Showing posts with label brush. Show all posts

Friday, 10 August 2012

Foundation - Brush Application Review and Comparison

Hi everyone! I hope that everyone is having a great weekend! We are going to watch the Perseids meteor shower so hopefully there will be clear sky for great visibility. Superstitious or not, I have some wishes to make and I hope that I will be able to land a job soon!

Today I'll be sharing a foundation application comparison with 4 different brushes that all the beauties out there commonly use. Note it may differ from brushes to brushes depending on the quality! I'm using the ones that I have in my collection.

BEFORE

To begin with, like usual I'll be showing you my bare face. I received my Kiehl's Dark Spot Corrector yesterday and started using it. I hope that it will fade out some of my scars and freckles! 

Revlon Photo Ready Foundation in 005 Natural Beige

As mentioned in my last post, I figured that I had to switch up a shade to match my skin colour. I'm continuously getting tanner but it will all fade away as the cold weather comes. Toronto seems to be getting gloomier as we are speaking! I hope that it will be all sunny and warm for my cousin-in-law's wedding end of this month!!!!!

One pump!

This is how much I'll be using for each application, half a face. Usually I use this amount for a full face application.

1. Conventional Paddle Brush


On this side of my face, I used the conventional paddle brush. My experience with brushes like this are usually not as good in comparison to the rest. It takes more time to apply and blend, and also the brush tends to absorb a lot of the product.

One pump of foundation was used in this half face application.

Result

Foundation on the left side of my face (your right)

As you can see, it does cover up some red spots but most of it are still visible. My skin looks as if it only has a very thin layer of foundation. Most of it went to the brush!


This is one of the popular  affordable brushes for foundation application. This is my first time using it with a liquid foundation. My usual routine on a lazy day, I will use this to apply my powder foundation all over as it gives the best coverage!


Result

This brush also took up all the products for a half face application. Due to the black bristles, I can't tell whether how much of the foundation retain on the brush.

DIRECT COMPARISON - Hair ribbon side (Paddle brush); The other side (ELF brush)


The finish and coverage seems to be very similar. Although the flat top brush took a lot less time and effort for application and blending. They are both slightly scratchy to blend. A better quality brush might be different!


I've been using this brush for foundation application religiously since I purchased it.. early last year? I like this because it's super soft and provides a quick and even application. Let's begin with my freshly washed face!


BEFORE


AFTER


AFTER with flash

Quick application and smooth finish. I did not need to use all the foundation for a half face medium to full coverage application.


Remaining foundation

To compare this to the paddle brush and ELF flat top brush, this is not scratchy at all and gives a better coverage with less product. If you are working with a foundation that is more tacky/ thicker consistency, I recommend you to use a brush like this for an easier application.


I particularly like stippling brush for bronzer and blush application if the product is exceptionally pigmented. The brush will pick up just the right about of product so you won't end up having stark lines on your face.. haha!


AFTER


AFTER with flash

If you have oily skin but fairly clear skin, this is the brush to go. It uses a only small amount of your foundation and gives a medium coverage!


As you can see I barely used anything for that one pump for such great coverage. I don't like it so much to blend because of the sparse bristles, and it could be slightly scratchy compare to a dense brush. I applied the foundation in a stippling motion so it takes a bit more time to work with compared to a flat brush. If you are always in a hurry this could be a problem for you.. unless you have a tiny face!


DIRECT COMPARISON - Ribbon side (Sigma F80 Kabuki); Normal hair side (Sigma F50 Dup Fibre)


The Flat top kabuki provides more coverage, though I did use more of the foundation. I have dry skin and using a dense brush with blending motion will provide a smoother finish with less dry patches. Again, if you are someone with oily skin and enjoys light application, go with the duo fibre brush and stipple away!!


Thank you for all the support and I will be working on YouTube videos soon! Please check them out!


Wednesday, 25 July 2012

Hard Candy Naturally Naughty Review & No Brush Makeup Tutorial

Hard Candy products are only available in Walmart and some of their products have been quite popular in the beauty community. Today I'm sharing a set that I recently purchased for about $8 at Walmart. It comes with 2 kal-eye-descopes eyeshadows, an eyeshadow primer, lash tinsel, take me out liner, & ginormous lash mascara.

Hard Candy Naturally Naughty Set at Walmart

I will be using my fingers for all the makeup application today. You certainly don't have to own brushes to do your makeup in you're on a budget! It's really quick and easy.

I applied L'oreal True Match Lumi Foundation and blend it out with my fingers. This colour was a bit too dark for me just about a month ago, but now it matches my skin perfectly.


L'oreal True Match Lumi Foundation in W5 Sand Beige


BEFORE (with foundation)

Firstly, apply a thin layer of the eyeshadow primer on your lids.


Hard Candy Eyeshadow Primer

Use your clean ring finger and pick up the lighter eyeshadow and apply it on the inner 2/3 of your lids.


Kal-eye-descope Baked Eyeshadow in High Maintenance


As such

Then use another finger and apply the darker shade on the 1/3 outer part of your lids. Blend lightly with another clean finger. You'll realise that the application is fairly smooth and seamless with fingers!


Eyeshadows complete

Line your upper lash line and 1/3 outer corner of your lower lash time with a brown liner.


Hard Candy Take Me Out Liner

Apply mascara and layer it with the glitter mascara provided.


Hard Candy Glamorous Lash Volumizing Mascara 


Hard Candy Lash Tinsel Glitter Mascara

Complete your face with your favourite blush and lip colour. Here I used an ELF All Over Stick as my blush/ highlight.


Complete look close up


Eye makeup


Complete!

Although Hard Candy products are cheap, some of them are not that great in quality. Some of the products that are lacking in this set are:
  1. The lighter colour of the baked eyeshadow. It was quite hard to pick up the colour, maybe foiling it would be the only way for it to be more vibrant.
  2. Take Me Out Eyeliner. The pencil is quite drying, more like an eyebrow pencil than eyeliner.
  3. Ginormous Lash Volumizing Mascara. It does nothing for my lashes. 
The 2 other products are decent but there is nothing special to say about it. Overall I would say give this set a pass unless you really want to try it out for yourself.

I do not like to provide negative reviews but I feel that it is important for companies to know that their products need improvement and consumers should not waste money on cosmetics that don't work.


Friday, 15 June 2012

Blue - Green - Gold Look (featuring Sigma Paris Palette)


Hello there! Hope everyone is having a great weekend! 

Today I'm back with a tutorial featuring the Sigma Limited Edition Paris Palette, using mainly the eyeshadows and blush from it and just a few other products.

To begin with, I'll show you my bare face!

BEFORE


Revlon Photo Ready Foundation in Nude; Sigma F80 Flat Top Kabuki

Start your face with moisturiser or face primer, and then apply Revlon Photo Ready foundation using the flat top kabuki brush. Blend accordingly.

Maybelline Eyestudio Gel Eyeliner in Blackest Black; MAC 209SE Brush

Use this eyeliner to tight line (upper lid water line). The eyeliner is definitely a more affordable option compared to MAC Blacktrack fluid line. The only difference with this Maybelline eyeliner and MAC's, this has a slightly more dry consistency. Both eyeliners apply smoothly with no clumps.

MAC Rubenesque Paint Pot

Use this paint pot as a base for your eyeshadows to adhere. I found that paint pots do not last very long and generally crease after a few hours. For longer lasting make up, please apply an eye primer underneath.

Paris Make Up Palette: Colours used are Versailles, Seine, and Orsay; Blush: Peche


Use the eyeshadow brush from the palette and apply colour "Seine" (Dark blue) on the outer corner and lightly go across your upper lash line.

Next, apply colour "Versailles" (Light gold) on the inner corner and lid, overlapping "Seine" just a little bit using the same brush flipped.

Then, blend "Orsay" (Green) on your socket/ where the eyeshadow ends. Wipe the blending brush on the tissue and blend out all the colours to prevent your make up looking too harsh.

Try to focus at the outside rim of the colours rather than the lids as you want the colours to stay how they are. 

Finally, to complete the eyes, line the upper lash line and the outer corner of the lower lash line with Maybelline eyeliner in Blackest Black. Use L'oreal Double Extension Ultra-Lengthening + renewed look mascara.

Use the Angled brush from the palette and apply colour "Peche" on cheeks.

L'oreal Double Extension Ultra-Lengthening + renewed look Mascara

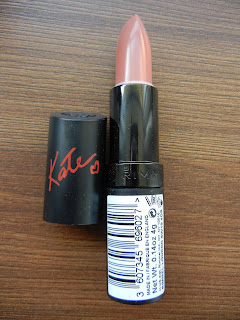
Rimmel Kate Lipstick in 07

And TADAAA! You're done!

Finish look 1

Finish look 2

Fnish look 3

Thank you all for the kind support and check back often :) 

See you tomorrow!

Saturday, 9 June 2012

$20 Make up challenge (Daily/ work appropriate)

Hello there!

So there is a tag going around the beauty vlog/ blogsphere that is spreading like wild fire! I gave it a try and it was surprisingly difficult. I certainly did not want to cheat and have everything from E.L.F. (btw, they are awesome) so I combined some of my own make up and just a few new ones that I got from Walmart to complete this look! 


Make up and tools (list and swatches below)

Feel free to click on the items to get you to the webpage where you can purchase them yourself!
  1. Milani Minerals Mousse Foundation in 302 True Beige for $7.99
  2. NYC Long Lasting Lip Colour in Fragile Pink for $1.50
  3. Wet & Wild Eyeshadow Trio in  335 Silent Treatment for $2.97
  4. ELF Essential Blending Eye Brush for $1
  5. ELF Essential Eyeshadow Brush for $1
  6. NYC Instant Lash Mascara for $1.50
  7. ELF Essential Brightening Eyeliner in Black for $1
  8. ELF Essential All Over Colour Stick in Pink Lemonade for $1
Grand Total: $17.96

FLTR: Eyeshadow "Eyelid", "Crease", "Browbone"; ELF All Over Stick; NYC Lippie; ELF Eyeliner

BEFORE

AFTER

Close Up 

The foundation was applied using fingers, I also would not use this product with a brush as it blends the best with fingers. Eyebrows were filled in using the tip of the eyeshadow brush with Wet & Wild "Crease" colour.  Also, I used the ELF Eyeliner to tight line and lined my lids. The rest are pretty self explanatory I suppose :)

The challenge was fun and I would definitely wear this look out. I understand that I did not use any eyeshadow base or concealer, but I don't often use those products, hence this look is based on what I usually wear out. 

Please try it out yourself too!!

Also follow me on twitter at www.twitter.com/AivysBeautyBlog