Showing posts with label swatch. Show all posts

Sunday, 9 September 2012

Essence Makeup Review and Swatches

Lately I've been out of the house for over 12 hours a day. For such long hours, I absolutely need a perfect base that will NOT crease on my oily eyelids. I don't have oily skin, but my lids are horrendous!!! No makeup will last over 3 hours without a primer.

If it's not your first time here, you know I talked about the importance of primers few months back. I still love my UD Primer Potion and Too Faced Shadow Insurance, but I found a base that cost only a fragment of the price and does the same thing!

The brand Essence is super affordable, just slightly higher than ELF but you are able to purchase it at most of the Shoppers Drugmart in Canada. If you live in Europe, they are available in most drugstores.


Essence Stay All Day Long Lasting Eyeshadow in 02 Glammy Goes To..


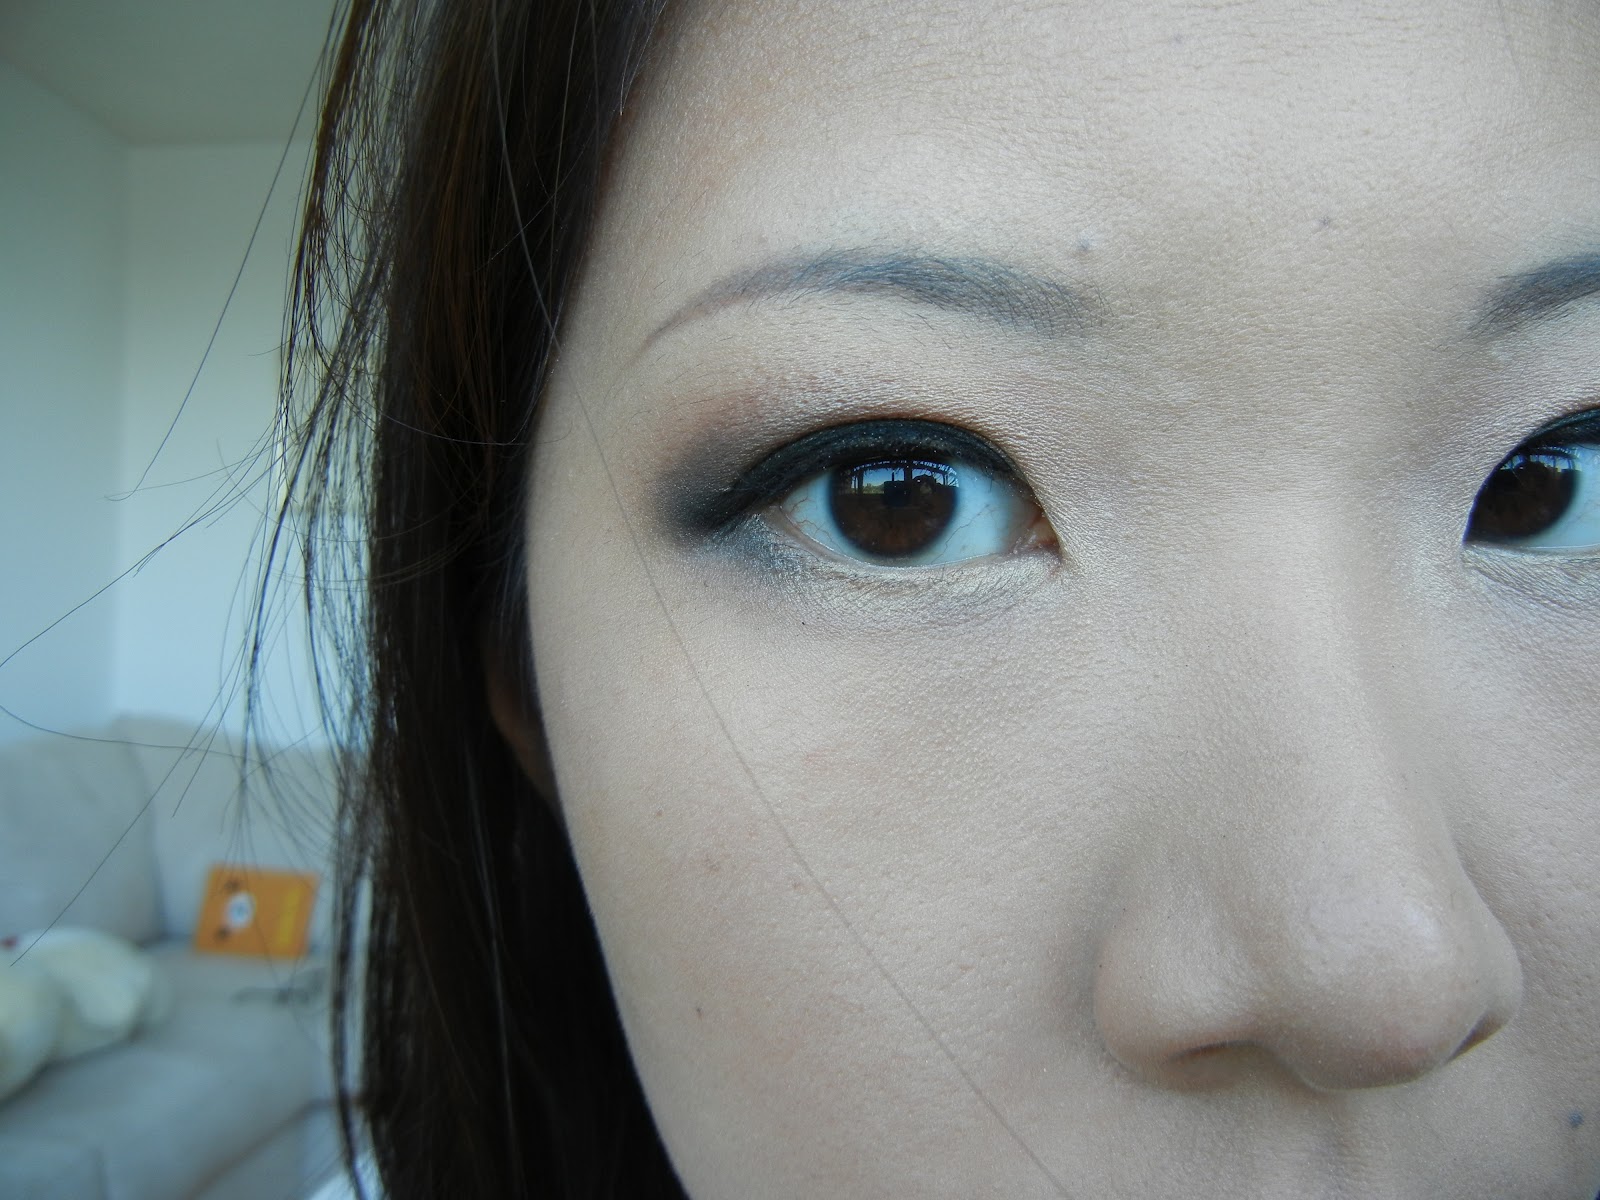
This product cost $4 and it acts AMAZINGLY as a base, whether you are intending to apply something matte or shimmery on top of it. This colour in particular seems to be able to not shine true if you want your eyeshadow to stay matte on top of the base. 

Even if my foundation has worn off, my eye makeup still looks as if I has just put it on! I apply and blend out this product with my fingers. Because of the dry texture, I'd imagine it will be hard to deposit colours using a brush.


Essence Stay All Day Long Lasting Eyeshadow in 01 Coppy Right

As I was so impressed with the other colour, I decided to purchase another one! Unfortunately this line only comes with 3 colours. There is a silver one but I don't have it.. yet. 

Along with this, I also purchased their Long Lasting Eye Pencil.


Essence Long Lasting Eye Pencil in 01 Black Fever

I love the Physicians Formula Eye Brightening Eye Pencil, but it comes in the trio and I cannot purchase only the black pencil individually. (I use it all the time but it's running out!)

This product claims to be long lasting, which I am taking its words since the eye base performs so well. I tried it on my hand and after it sets, it does not budge even if I try rubbing it. 

I'm going to give this a further trial on my tight line and I hope it works! This was approximately $3.


Swatch

The next time if you see the brand around your neighbourhood you should try to get some stuff to try. They have amazing nail polishes too! I believe they are about $2 and they come in all sorts of amazing colours.


Friday, 7 September 2012

Toronto Fashion Night Out & YSL Rouge Review

Hi all! Thanks for having so much patience and keep checking back for posts. I've been a bit busy but I will make sure that I update regularly!

Since I live downtown Toronto, my husband and I managed to catch a bit of the Toronto Fashion Night Out at Holt Renfrew. I got some freebies from the YSL counter inside! Yay for freebies! H&M was serving some yummy drinks so that was awesome too!


Samples from YSL

So that's the small sample bag that I received from the YSL counter in Holt. I'm pretty excited to try out the mascara. 


Bloot st west

There were people queuing up for free drinks, confettis everywhere, and SUPER loud music (not fond of that!). 


Free limited edition Diet Coke for Holt 175

It was pretty good although it's a really small event compared to what I saw online of the NYC FNO!

--------------

I tried out one of the lip stick this morning for work. 


YSL Rouge Pur Couture No.10

It applied smoothly with the brush that was included in this sample. I liked it when I looked at myself in the mirror, however it really washes my complexion out in photos!


With flash


Without flash

What do you think? I kind of like it.. but this thing has no lasting power! You would have to reapply so often if you want the colour to show up on your lips! I'm going to give the darker colours a try this weekend and get back to you on that. :)

I hope everyone is doing well and have a great weekend ahead!


Monday, 20 August 2012

Benefit How to Look The Best at Everything Review - Light

If you have checked out my recent Sephora Haul, you have already seen me featuring the new Benefit How to look the best at everything kit in colour Light. Although I have some other Benefit products, but this is my first time using all the products in the kit. It is a great deal if you just want to try them out!

How to look the best at everything!!

And I'm sure you want to be the best - ALWAYS! 

BEFORE

As usual, this is my bare face! From now on I'll be filming and blogging from the bedroom because my lovely husband kindly bought and set up the new workspace for me :)


The inside

This kit cost $30 and in it you'll get a Porefessional (7.5ml), Hello Flawless Oxygen Foundation in colour Cheers to Me Champagne (7ml), 2 Boi-ing concealers in colour 01 and 02 (2x1.5g), Hello Flawless Powder in colour Me, Vain? Champagne (4g), and a small brush. 

Benefit POREfessional

I was surprised that the Porefessional is tinted, however the colour does not show through upon application. It's meant for covering up areas of the face with large pores. I applied this with a light hand, dabbing motion on my inner cheek area where I have some larger pores. I have to say that I see no difference in the pore size or the finish of my skin after the product. 

This base has a slight scent, nothing too crazy. It leaves the skin feeling smooth.

Hello Flawless Oxygen Foundation in "Cheers to Me" Champagne

I used this product with my F80 Sigma Flat Top brush to buff it out. This entire kit is slightly too fair for my skin, though the Medium one might be too dark.. which I won't be able to use during the long cold months here in Canada. Hahahahaha...

The foundation has light to medium coverage. Suitable for daily wear in low humidity.


After POREfessional and Hello Flawless Foundation

As you can see, my skin still looks fairly red and you can see some redness and freckles on my cheek area.

Next up I'll be covering up some dark circles and redness around the face.

Boi-ing Concealers in colour 01, 02

I have been wanting to try Benefit's concealers for ages cause I have heard SO MANY good things about that. Both the Boi-ing and Erase Paste has fairly good reviews. I used only colour 02 on my face.

The concealers are more dry in texture and definitely covers well. However to use it under the eyes, you will have to moisturize your skin very well before the concealer. I didn't, and I noticed a lot of fine lines!!!! (I'm not even 24 yet!!! T.T)  

I finish my skin with an overall application of the powder. The powder is lovely and it's the best thing in the kit after the concealers!

Close up!

Overall I think that this is a good value and you are able to pick it up at Sephora for only $30. Keep in mind that the sets seem to have darker shades than they labeled it as, and there are only 3 different kits to choose from. 

Tadahh!

If you are interested in what I bought during my trip to Sephora, check out the video!!


Thank you and please leave a comment if you would like me to try out any products for future reviews!

Tuesday, 14 August 2012

Sephora Haul

Hi all! I hope everyone had a great weekend! Yoshi and I were lucky enough to be able to visit our families and went star gazing during the weekend. Unfortunately the weather in Toronto and surroundings are not so great.. so we only had about 30 mins of meteor shower watch until the clouds covered the sky again.

I was feeling a little bit discourage today and decided to head to Sephora to check out if there are any new products that interest me! Please click on the video for my haul! I'm including some swatches here for some of the products.

Link for my haul video: http://youtu.be/YuAHhWIPnN8?hd=1


YAAYYY for great deals!


Tokidoki Arte Palette $4

This is decently pigmented and super great deal now! They have this palette in another colour but unfortunately it is out!

Tokidoki Inferno Bronzer in Diavolina $8

I'm impressed on how smooth the powder is to touch!!!!! Hopefully it will turn out great!

Sephora Lip Sampler $30

This is the bomb! $30 for 6 products and some are full sized! Totally worth the deal!

Sugar Rose; Hourglass Child

Sephora Precious Pink; Bite Vintage

Tarte LipSurgence (not in box, coral) Joy; Tarte Hope

I'm extremely excited to be testing these products out! Grab yourself some before they run out at Sephora :)

I'll be doing more videos from now on so please subscribe to AivysBeautyAdventure for more beauty hauls and tutorials!

Tuesday, 7 August 2012

Wedding Series - Smoky Look

In continuation of the wedding makeup request, I am here to today to share makeup number 2 of 3 - Smoky Look! Check out the first look I created for the series here.

Begin with a clean palette and prime your face with a moisturiser or face primer.

Complete Look

BEFORE

Sigma F80; Revlon Photo Ready Foundation in 004 Nude

Similar to my last post, I would like to remind you to avoid using any sun screen or a foundation that contains high sun protection. This is create a white cast on your face during flash photography. This foundation colour is definitely getting slightly too light for me, I'll be switching it up a shade!

Remember to fix your eyebrows too!

Water Strong W Eyebrow; Spoolie


Candy Doll Concealer in colour 1

I like to apply concealer after the foundation. This way I won't need to apply many layers of foundation and cover up the areas that require more coverage with a concealer. You can also blend it the concealer on areas that you wish to highlight.

haha!

Now let's continue on to the eyes..

Where to tight line?

I never skip tight lining my eyes whenever I do a makeup look. It is important for sparse lash girls like me as it will create a fuller looking lash line and also make your eyes appear more awake.

There!!!

I know it looks quite creepy.. At this step you don't have to worry for it to look perfect!

Prime your lids

Use Urban Decay Primer Potion in Sin to prime your lids. This prevents your eyeshadow from creasing and enhances the colours that we will be applying later!

Majorlica Majorca in BE286

Use a shimmery pinky/ coraly  colour and apply it on the inner 1/2 of your eyelids.

Like so..

MAC Eyeshadow in Club

With the same brush, apply colour Club on the outer 1/2 of your lids. Remember to always look straight and check where you want the eyeshadows to end.

I highly recommend this MAC colour! It is a duo chrome brown/green base with coral when blended out. 


Always check where your eyeshadow ends!!

Blend it out so that there won't be a harsh line on your lids. Use a fluffy brush like the one below.

Sigma Blending Brush

Blended

MILANI Liquif'Eye Eyeliner Pencil in Black

With the same eyeliner that we used for tight lining, line your lash line and blend it out with a black shadow using a pencil brush.

Pencil Brush; Matte Black Shadow

Blend out the liner

With the remaining left on the pencil brush, blend it slightly onto the lower lash line. Use the tip of the shadow brush and apply the shimmery colour in the inner corner of the lower lash line.

Almost there!

Tapered Brush; NYC Sunny Bronzer

With a matte bronzer or a dark powder, contour the sides of your face and nose.

Lightly contoured

For this look I recommend to use a coral colour blush.

Small Stippling Brush; Pantone + Sephora Blush in Apricot Brandy

I recommend to always use a stippling brush when dealing with blushes or bronzers that are extremely pigmented. 

Yay!!

Now to complete the look..

Tarte LipSurgence in Smitten

This product is absolutely moisturising and long lasting! If you are not intending to reapply very frequently, use this!!! You can purchase this at Sephora! It comes in many colours and I really want to get more of them!!

Close up

Last but not least..

Urban Decay All Nighter Long Lasting Makeup Spray

Make sure you can dance for all night long at your wedding reception!

Complete Look!!!

Thank you for your support and please follow me on Twitter if you wish to chat with me!