Showing posts with label physicians formula. Show all posts

Friday, 13 July 2012

Skin 79 Super + BB Cream Triple Functions (Pink) Review/ Quick Makeup Tutorial

Hi there! Today I'm here to review a Korean BB cream that I've owned and tried for a very long time. In conjunction to that, I also decided to do a very quick look that it suitable for everyday or work if you are short of time for makeup.


ELF Glossy Gloss in Sweet Salmon; Maybelline Falsies Mascara; Tarte Amazonian Clay Blush in Dollface; Skin79 Super + BB Cream; ELF Studio Blush Brush; Physicians Formula Eye Brightening Pencil


Those are the only products I'll be using for look, it's quick and simple, and can be easily completed in less than 5 minutes! 


Before

I applied and blend the BB cream using my fingers.


BB Cream application + Tight lined with Physicians Formula Eye Pencil

Use a blush brush to apply your favourite pink blush on the cheeks and complete the look with your favourite lip gloss!


Complete Look

Now the review for Skin79 Super + BB Triple Function Cream.


Skin 79 BB Cream

This product has a grey tint upon application, it will blend out to fit your skin tone after oxidisation. However it probably will not work if you have really tanned skin.


Close up

It will feel rather sticky on your face once you apply it, though after about 10 minutes it will feel very smooth and not oily. This BB cream claims to have benefits such as skin whitening, wrinkle free (?), and a SPF 25 PA++ sun protection.

Pros:
  • Light weight
  • Light to medium coverage
  • Smooth finish
  • Fragrance free
Cons:
  • Difficult to purchase if you're not in Asia, hence the price can be elevated due to the same reason
  • Grey tint, visible in pictures
  • Lack of colour selection
If you have any BB cream that you recommend or want me to try please leave a comment! ^.^

Tuesday, 10 July 2012

Bronze & Coral Makeup Tutorial

Hi everyone! Today I'm back with a summer themed makeup tutorial featuring bronzed eyes and coral lips!


Finish Look

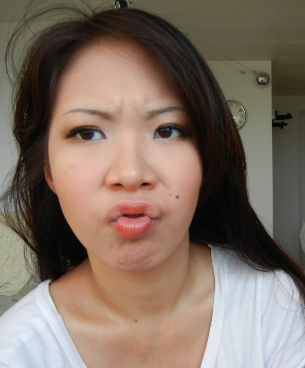
Unfortunately my skin is not in its best condition and the pictures of myself are also not that great today.


I got frustrated!!


Before

Nontheless I'll still share this look with all of you :)


Sigma F80; Revlon Photo Ready Foundation in Nude

Like usual, prime your face with a primer/ moisturiser/ sunscreen and apply your favourite foundation. I am using the usual, although from time to time I do switch it up a little.


Physicians Formula Eye Brightening Eyeliner (Brown); Eye Strong Brow Pencil; Maybelline Falsies Mascara 

Tight line your eyes using the Physicians formula eyeliner pencil and groom brows like usual. 


NARS Soft Touch Shadow Pencil in Skorpios

Use a bronze colour base to prime your eyes. This will help to bring out the eyeshadow colours we are going to lay on later.


Tight lined + NARS Skorpios base


NAKED Palette (1)

Today I'll be using 3 colours from this palette, Smog (Dark Bronze), Sin (Shimmery Pinky Beige), and Virgin (Shimmery Beige). Feel free to use the eyeshadows you have in your collection. There is no need to buy this palette if you already have similar colours.


F21 Dual Ended Brush; Furless Blending Brush; ELF Eye Crease Brush; random Eyeshadow Brush

I really like the dual ended brush from Forever 21 but they no longer carry it in store. I bought this quite awhile ago now, although they constantly have new makeup tools, I'm not sure if the quality is similar to this one that I own. 


Base colour (Smog)

First, use the eyeshadow brush and pick up a dark bronze colour and apply it 3/4 across the upper lid and 1/3 of the lower lash line. Leave the rest clean for the next colour.


Apply Sin (Shimmery Pinky Beige) + Blended

Use the ELF brush to apply colour Sin and blend out with the Furless Blending brush using a bit of Virgin (Shimmery Beige) colour.


Completed Eyes 1

Line your upper lash line with the same Physicians Formula eye pencil and apply mascara.


Completed Eyes 2

We're almost there!


Canmake Powder Cheeks in PW19; Tarte Mineral Bronzer in Park Ave Princess

Use the dual ended brush and apply a coral blush and contour lightly with a bronzer for a sunkissed look.


Without lip colour

Apply your favourite coral lip colour, I'll be using Revlon Lip Butter in 015 Tutti Fruitti.


Revlon Lip Butter in 015 Tutti Fruitti


Tadahhhhh!

That's it for today :) I'll see you tomorrow again with another makeup tutorial!


Monday, 18 June 2012

Smokey Eyes Tutorial (Sigma Paris Palette)

Happy Monday!

I'm back today with a simple make up tutorial! I have to say I am not so much of a smokey eye wearer, however if I do, I'll make sure it has a pop of colour or that it is bright enough so that my eyes don't disappear in the dark make up.

Most people find that smokey eye make up is hard to achieve, however if you try to complete your eyes before the rest of the make up, this will give you the freedom to clean up with Qtip + make up remover.


Today's look


Base completed (because I was out earlier during the day) and tight line + upper lash line


Products used:


MAC Mineralize Blush in Daft Pink


NYC Bronzer in Sunny


Prestige My Blackest Lashes Mascara; Physicians Formula Eye Brightening Eyeliner


MAC Lipstick in Ever Hip

Tools used:


Steps required:


Use the Sigma Eye Shading E55 brush to apply colour "Eiffel" (Black with sparkles) on the outer corner of the lid and drag it along the lash line. Remember to keep looking back up into the mirror with eyes open to find out where you want the black to end.


Like so :)

Apply next colour in the centre of the lid

Apply colour "Triomphe"(green gray) in the centre of the lid to create ombre effect. This prevents your entire eye to just be covered in black.


Final eyeshadow application

Apply colour "Orsay" (Bright green) in the inner corner of the lid and lower lash line. Use the colour sequence like before to line the rest of the lower lash line too.

Blend.


Blended look + eyeshadow and mascara!

Apply highlight colour underneath the brows and a little bit on the inner corner as required.

Feel free to reapply any eyeshadow that you find necessary to make it look more vibrant. Apply eyeliner and mascara. Finish off with a nude/peach shade lipstick and your favourite blush!

Thank you for reading and I'll see you tomorrow :D 


Sunday, 17 June 2012

Favourite Make Up Palettes

Happy Father's Day to all the fathers in the world! I hope everyone is having a great time with their family members! Unfortunately my dad is so far away right now.. Hopefully I get to see him soon.

Today I will share a few palettes that I've used quite extensively and enough to call it my favourite compared to other make up palettes I have. Anyone who have seen my collection knows that I have piled up quite a bit  of cosmetics over the years!

Note: You are only able to purchase these products online. Which means all my readers from all over the world is able to access it!!!

Number 1


Folds into a compact size

This palette has 56 eyeshadows, 2 blushes, 8 gel eyeliners!!, 5 brow wax, 3 highlights, and 4 lip glosses. I LOVE this palette. I've used this for my mother-in-law's wedding and mine as well. It has awesome pigmentation and it's a great palette for travel and even make up artists. It has everything that you need for all types of looks!!!!! 

I HIGHLY recommend this palette. Yes it does come with a higher price tag, but I assure you that you will not find one that is as complete as this and as good quality!!!

Number 2


This cost $18.95 on Coastal Scents but you can certain search for one with a lower price tag on Ebay! Simply put in the name of the palette you'll be able to get over 100 hits.

The reason this is my 2nd favourite is because the pigmentation is great, and it has a good variety of blushes. This is also convenient when I take this along to do someone else's make up, I'm able to create many colourful looks that is not achievable in the first palette.


Number 3


Great palette if you like neutral looks. Suitable for wedding make up as most ladies prefer a more natural look on the big day. Same as the palette above, try searching it on Ebay to save yourself a few bucks!

To end my post today, I'll share with you a very simple LOTD.

Hello!

Close up

I used Physicians Formula black eyeliner to tight line and lined half of my top lash line. Smudge it out with an angle brush using a brown colour eyeshadow for a more natural look. Finish the look with your favourite blush!

See you tomorrow :)

Thursday, 14 June 2012

Bright Lip - Neutral Eyes Make Up Tutorial


Hello there! Today I'm going to share a rather simple make up tutorial that is suitable for everyday wear and evening night out :)

Since this is my first time doing it, please excuse if I've accidentally missed out some parts. Feel free to leave me comments to ask me about anything! Please click on the product names underneath each picture to purchase them online.

BEFORE

And of course I have to scare you with a photo of my bare face!

Revlon Photo Ready Foundation in Nude; Sigma F80 Flat Top Kabuki

MAC Eyeliner Brush 209SE; MAC Blacktrack Eyeliner

So I generally start with moisturiser/ sunscreen as a base and then foundation on top, blending it with the Sigma Flat Top Kabuki that I swear by. Fill in my eyebrows and then tight line! (Tight lining: Applying eyeliner to the upper water line). Tight lining helps to create fuller looking lashes.

Progression check!

Wet n Wild Eyeshadow Palette in Comfort Zone; Elf Eyeshadow Brush; Sigma E25 Blending Brush

Essence Stay All Day Creme Eyeshadow in 02 Glammy Goes To...

Use Essence Stay All Day Creme Eyeshadow as a base using bare fingers; Apply "Crease" colour (3rd left from top) all over the lid, "Definer" (Bottom right) on the outer corner. 

Before blending..

A lot of people find eyeshadow application difficult and super easy to messed it up. With a blending brush, just lightly go across where the colour ends and blend it in circle motion. This will ensure flawless finish!

Blended and Eyeliner + Mascara Application

Physicians Formula Eye Booster 2-in-1 Felt Tip Eyeliner + Serum

Prestige My Blackest Lashes Mascara (Michele1218's fav!)

NYC Sunny Bronzer; Elf Complexion Brush

I dust the bronzer around the face in the shape of  "3" and also the sides of my nose for minor contouring. 

Wet n Wild Coloricon Blush in Heather Silk

With the same complexion brush, I applied the blush on my cheeks! My apologies that this picture does not show up the colour correctly. In person this blush looks a lot brighter!

Finish off with Rimmel's lipstick (loves!)

Rimmel Kate Lipstick in number 12

Finish Look 1

Finish look with glasses!

Thank you for visiting my blog and please check back often as I update everyday! <3